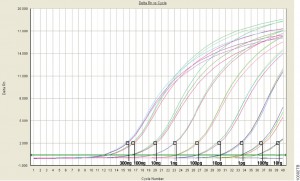
For those of us well versed in traditional, end-point PCR, wrapping our minds and methods around real-time or quantitative (qPCR) can be challenging. Here at Promega Connections, we are beginning a series of blogs designed to explain how qPCR works, things to consider when setting up and performing qPCR experiments, and what to look for in your results.
First, to get our bearings, let’s contrast traditional end-point PCR with qPCR.
| End-Point PCR | qPCR |
| Visualizes by agarose gel the amplified product AFTER it is produced (the end-point) | Visualizes amplification as it happens (in real time) via a detection instrument |
| Does not precisely measure the starting DNA or RNA | Measures how many copies of DNA or RNA you started with (quantitative = qPCR) |
| Less expensive; no special instruments required | More expensive; requires special instrumentation |
| Basic molecular biology technique | Requires slightly more technical prowess |
Quantitative PCR (qPCR) can be used to answer the same experimental questions as traditional end-point PCR: Detecting polymorphisms in DNA, amplifying low-abundance sequences for cloning or analysis, pathogen detection and others. However, the ability to observe amplification in real-time and detect the number of copies in the starting material can quantitate gene expression, measure DNA damage, and quantitate viral load in a sample and other applications.
Anytime that you are performing a reaction where something is copied over and over in an exponential fashion, contaminants are just as likely to be copied as the desired input. Quantitative PCR is subject to the same contamination concerns as end-point PCR, but those concerns are magnified because the technique is so sensitive. Avoiding contamination is paramount for generating qPCR results that you can trust.
- Use aerosol-resistant pipette tips, and have designated pipettors and tips for pre- and post-amplification steps.
- Wear gloves and change them frequently.
- Have designated areas for pre- and post-amplification work.
- Use reaction “master mixes” to minimize variability. A master mix is a ready-to-use mixture of your reaction components (excluding primers and sample) that you create for multiple reactions. Because you are pipetting larger volumes to make the reaction master mix, and all of your reactions are getting their components from the same master mix, you are reducing variability from reaction to reaction.
- Dispense your primers into aliquots to minimize freeze-thaw cycles and the opportunity to introduce contaminants into a primer stock.
These are very basic tips that are common to both end-point and qPCR, but if you get these right, you are off to a good start no matter what your experimental goals are.
If you are looking for more information regarding qPCR, watch this supplementary video below.
We’re committed to supporting scientists who are using molecular biology to make a difference. Learn more about our qPCR Grant program.
Related Posts
Michele Arduengo
Latest posts by Michele Arduengo (see all)
- The Casual Catalyst: Science Conversations and Cafes - July 18, 2024
- Cancer Moonshot: Solving Tough Problems - May 28, 2024
- Automated Sampling and Detection of ToBRFV: An Emerging Tomato Virus - April 25, 2024

Thanks for your tips about qPCR!I’ve learned a lot. qPRC can be used for the RNA analysis and genotyping,……