A Cold Case, A Mystery, and DNA Databases

“How do you like the name Jack?” the woman on the phone asked.

41731849 - soft focus and blurry of baby hands vintage style color effect

On April 26, 1964, a nurse came into the hospital room of Dora Fronczak, who had just given birth to her young son, Paul. She told Mrs. Fronczak that it was time to take the baby to the nursery (at that time newborns did not stay in the room with the moms), took the baby, and left. A few hours later, another nurse came into the room to take young Paul to the nursery. It was then that everyone realized a mother’s worst fear: Her infant had been stolen.

Authorities were able to determine how the woman left the hospital and that she got into a cab, but they were never able to find the woman. However, in 1965, a small toddler-aged boy was found, abandoned outside a store in New Jersey. Blood tests were not inconsistent with him being Paul Fronczak (DNA testing was not available), and there were no other missing children cases in the area that were matches. The little boy was sent to Chicago as Paul Fronczak and the case was closed.

However, as an adult, Paul Fronczak began to suspect that the couple who raised him were not his biological parents, and in 2012 Paul underwent DNA analysis to test his suspicions. The results showed that indeed, he was not the biological son of Dora and Chester Fronczak. His next step was to enlist the help of a genetic genealogist to assist him in finding his true biological parents and his identity.

By conducting “familial searches” using commercially available DNA databases like 23andMe and AncestryDNA and many resources, the genealogist’s group found a match to his DNA on the east coast. Further groundwork, discovered that this family was indeed Paul’s…now Jack.

The knowledge of Jack’s true identity didn’t bring with it a joyous union of the adoptive family who had raised and loved Jack (as Paul) with the biological family who had pined for him over the years as many might imagine.

Continue reading “A Cold Case, A Mystery, and DNA Databases”

Ten Validation Tips You Need to Know

example

Forensic lab validations can be intimidating, so Promega Technical Services Support and Validation teams shared these tips for making the process go more smoothly.

  1.  Prepare Your Lab. Make sure all of your all of your instrumentation (CEs, thermal cyclers, 7500s, centrifuges) and tools (pipettes, heat blocks) requiring calibration or maintenance are up to date.
  2.  Start with Fresh Reagents. Ensure you have all required reagents and that they are fresh before beginning your validation. This not only includes the chemistry being validated, but any preprocessing reagents or secondary reagents like, polymer, buffers, TE-4 or H2O.
  3. Develop a Plan. Before beginning a validation, take the time to create plate maps, calculate required reagent volumes, etc. This up-front planning may take some time initially, but will greatly improve your efficiency during testing.
  4. Create an Agenda. After a plan is developed, work through that plan and determine how and when samples will be created and run. Creating an agenda will hold you to a schedule for getting the testing done.
  5. Determine the Number of Samples Needed to Complete Your Validation. Look at your plan and see where samples can be used more than once.  The more a sample can be used, the less manipulation done to the sample and the more efficient you become.
  6. Select the Proper Samples for Your Validation. Samples should include those you know you’ll obtain results with be similar to the ones you’ll most likely be using, and your test samples should contain plenty of heterozygotes. When you are establishing important analysis parameters, like thresholds, poor sample choice may cause more problems and require troubleshooting after the chemistry is brought on-line.
  7. Perform a Fresh Quantitation of Your Samples. This will ensure the correct dilutions are prepared. Extracts that have been sitting for a long time may have evaporated or contain condensation, resulting in a different concentration than when first quantitated.
  8. Stay Organized. Keep the data generated in well-organized folders. Validations can contain a lot of samples, and keeping those data organized will help during the interpretation and report writing phase.
  9. Determine the Questions to Be Answered. While writing the report, determine the questions each study requires to be answered. Determining what specifically is required for each study will prevent you from calculating unnecessary data.  Do you need to calculate allele sizes of your reproducibility study samples when you showed precision with your ladder samples?
  10. Have fun! Remember, validations are not scary when approached in a methodical and logical fashion. You have been chosen to thoroughly test something that everyone in your laboratory will soon be using. Take pride in that responsibility and enjoy it.

Need more information about validation of DNA-typing products in the forensic laboratory? Check out the validation resources on the Promega web site for more information for the steps required to adopt a new product in your laboratory and the recommended steps that can help make your validation efforts less burdensome.

Vikings in the British Gene Pool

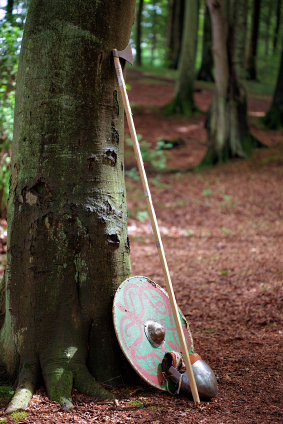
Are Viking genes in the British gene pool?
As I write this blog entry, the first day of presentations at the 22nd International Symposium on Human Identification is finishing up. [However, by the time you read this, the entire conference will be wrapped up.] As I expected, the first day was great, and the talks were very informative. As a person of Scandanavian descent who is married to a Brit, I was particularly intrigued by a talk given by Mark Jobling from the University of Leicester entitled “Fishing for Vikings in the Gene Pool of Britain”. Could marauders from my ancestors’ homeland have invaded my husband’s birthplace long ago and perhaps even contributed to his genetic makeup? DNA analysis might help answer that question. Continue reading “Vikings in the British Gene Pool”