
It is summer here in Wisconsin and the kids are out of school. If you are like me, you are looking for things to keep them busy and (bonus!) maybe teach them something. Below is a list of relatively easy, do-at-home science projects that can be fun for the whole family to try.
Parental supervision is recommended/required for these. And if you don’t want to worry about major clean up (or repainting walls and ceilings) you might want to do these outside whenever possible. I might be speaking from personal experience on this point, so trust me.
Build Weather Station
This project is best for older kids. Making scientific measurements of your local weather can be fun and educational. Building an anemometer to measure wind speed, a weather vane to find wind direction, a barometer for measuring atmospheric pressure, a screen thermometer to measure air temperature, a hygrometer to measure humidity and a rain gauge to measure rainfall. The instructions for some of these are pretty complex. If you have them keep a journal to record their readings, they can compare them to the “official” reading for your area (you can look these up on the National Oceanic and Atmospheric Administration’s web site (www.noaa.gov).
Build and Launch a Bottle Rocket
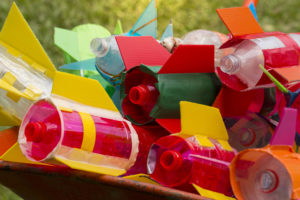
Do this outside! The rocket will take off suddenly, so keep everyone back once you start pumping the air.
You will need
- plastic bottle
- one cork that will fit in the mouth of the bottle
- water
- cardboard to make a cone and four fins
- air pump with a needle adapter
Instructions
- Push the needle adaptor of the pump through the cork, it needs to go all the way through so you might have to trim the cork a little bit.
- Decorate the bottle with the cone and fins.
- Fill the bottle one quarter full of water and push the cork in tightly.
- Take the bottle outside and connect the pump to the needle adaptor. Ours wouldn’t stand up on the fins so we rested it on a table, but if you make some strong fins it should stand up by itself.
- Pump air into the bottle, making sure all spectators stand back, the bottle will lift off with force after a few seconds.
What they are learning: Isaac Newton’s third law “For every action there is an equal and opposite reaction.” As air is pumped through the water, the pressure builds inside the bottle until the force of the air pushing on the water is great enough to push the cork out of the end of the bottle. As the water rushes in on direction (down), the bottle is pushed in the other (up).
Make a Colorful Foamy Fountain
This foam uses yeast as a catalyst to remove the oxygen from the hydrogen peroxide. It happens quickly so there are a lot of bubbles. Have the kids touch the bottle as this is happening. This reaction is exothermic (giving off heat) so the bottle should start to feel warm. The foam is water (and food coloring), soap and oxygen so it is safe on the skin but could stain clothing (and walls and ceilings) depending on how much food coloring is used. You can read more and see a video here.
You will need
- A clean 16 ounce plastic soda bottle
- 1/2 cup 20-volume hydrogen peroxide liquid (20-volume is a 6% solution, ask an adult to get this from a beauty supply store or hair salon). This can irritate the skin and eyes, so be careful and let the adult pout it!
- 1 Tablespoon (one packet) of dry yeast
- 3 Tablespoons of warm water
- Liquid dish washing soap
- Food coloring
- Small cup
- Safety goggles
- Wear old cloths
- Funnel if you have it
Instructions
- Pour the Hydrogen Peroxide into the bottle (wear safety glasses and be careful!)
- Add your favorite food coloring (6-10 drops)
- Add 1T of dish soap
- Combine yeast and warm water is a separate cup. Mix it and let sit for about 30 seconds (this activates the yeast).
- Prepare your selves (safety glasses)!
- Pour the yeast mixture into the bottle (using a funnel can help).
Help them learn. Ask these questions and then have then decide what they would do to answer them (you might be making several fountains!). What happens if you change the amount of yeast? What happens if you don’t activate the yeast (use it dry)? What if you change the size of the bottle?
Optics: Bend Light with Water
In 1842, Swiss physicist Jean-Daniel Colladon (1802–1893) showed that you can guide light with a falling stream of water. This is simple to do at home as described below.
You will need
- Empty bottle
- Water
- A screw driver or any pointed thing
- A laser pointer (green works best)
- A bowl
Instructions
- Punch a hole on the surface of the bottle.
- Make sure that you punch the hole at or around the middle of the bottle.
- Put the bottle into the bowl and fill the bottle with water. (The water will start flowing out of the bottle through the hole.)
- Using the laser pointer, project the a beam horizontal to the hole from the other side of the bottle.
What they are learning. The optics of water and light. Notice that the light of the laser beam follows the laminar flow of water stream and follows down along with water into the bowl. For older kids, you can learn more about the science of optics (and this demonstration) visit the website.
Build a Solar Oven
In this experiment, the sun’s energy can be harnessed to heat up the interior of your box/oven. You can melt a bowl of chocolate chips or cheese on chips for a tasty treat.
You will need
- Cardboard pizza delivery box (bonus, you don’t need to cook tonight, and it is all for science!)
- Box knife or scissors (the adult does the cutting!!)
- Aluminum foil
- Clear tape
- Plastic wrap (a heavy-duty or freezer zip lock bag will also work)
- Black construction paper
- Newspapers
- Ruler, or wooden spoon
- Thermometer
Instructions
- Cut a flap in the lid of the pizza box with the box cutter or scissors. Cut along three sides, leaving about an inch between the sides of the flap and the edges of the lid. Fold this flap out/up so that it stands up when the box lid is closed.
- Wrap this flap with the aluminum foil so that the inner side of the flap is covered with aluminum foil. Tape the foil at the back or on the sides. (Discuss that now it can reflect rays from the sun).
- Tape a double layer of clear plastic over the opening of the box that you created when you cut the flap above. Leave about an inch of plastic overlap around the sides and tape each side down securely, sealing out air. This creates an airtight window for sunlight to enter into the box. If you use a plastic bag, cut out a square big enough to cover the opening, and tape one layer over the opening.
- Line the bottom of the box with black construction paper (discuss with them that the black absorbs heat). The black surface is where your food will be set to cook. How much you need will depend on the size of the pizza box you’re using to make your solar oven.
- Roll up sheets of newspaper and tape them to the inside edges of the box so that they form a border around the cooking area. (Discuss that this insulates your oven so it holds in more heat), Note: It may be helpful to also tape the rolls closed first. The newspaper rolls should make it so that the lid can still close, but there is a seal inside of the box, so air cannot escape.
- The best hours to set up your solar oven are when the sun is high overhead—from ~11 am to 3 pm. Take your oven outside to a sunny spot and adjust the flap until the most sunlight possible is reflecting off the aluminum foil and onto the plastic-covered window. Use a ruler or dowel to prop the flap at the right angle. You can also angle the entire oven by using a rolled up towel.
- Place the thermometer inside your oven before you close it, so you can check the temperature.
Start Cooking! You can make toast by buttering a slice of bread then letting the sun do the rest. Cook a hot dog or make nachos with chips and cheese. Put what you would like to cook on a clear plastic or glass plate to keep the bottom of your oven clean. Place the thermometer inside your oven before you close it, so you can check the temperature.
To take food out of the oven, open up the lid of the pizza box, and using oven mitts or potholders, lift the Plastic or glass dish out of the oven.
What they learn. Because the sun’s rays hit the earth at an angle, you need the foil to reflect it into the box. Once it passes through the plastic wrap, it is trapped inside the box, heating up the air trapped in the box. The black paper at the bottom absorbs the heat at the bottom, and the newspaper insulates the box to keep the heat inside the box. The temperature inside the oven can reach ~200°F on a sunny day. It will take a while to do something like melt cheese. For more information (and pictures of all the steps) you can visit this page.
Want to try more things in your oven? Here are some this site has a PDF of recipes.
Hey, maybe the kids can cook dinner tonight?!
It is a Long Summer
There are a ton of other ideas online. Here are a couple of useful places to look.
http://kitchenpantryscientist.com/
https://www.homesciencetools.com/a/summer-science-projects
Do you have other websites you would recommend? Share them in the comments section!
Kelly Grooms
Latest posts by Kelly Grooms (see all)
- Discovery of Protein Involved in TDP-43 Cytoplasmic Re-Localization Points to Potential Gene Therapy for ALS and FTD - April 2, 2024
- Dynein Motor Proteins Could Be the Moving Power Behind Cancer Metastasis - February 16, 2024
- Cyanobacteria Identified as Cause of Elephant Mass Mortality Event - January 11, 2024